HTML to APK Quick Packaging Tutorial
This tutorial will walk you step by step through using HTML2APK Packer to quickly package web pages or local HTML projects into Android apps. The entire process takes only 5 minutes, requires no programming skills, and no Android development environment setup.
Target Audience: Frontend developers, web designers, product managers, individual developers, non-technical users
Estimated Time: 5-10 minutes
Learning Goal: Master the complete workflow of packaging HTML projects/URLs into APK files
Preparation
Before starting, please ensure:
- You have downloaded and installed HTML2APK Packer
- You have a URL or local HTML project ready to package
- (Optional) An APP icon ready (recommended 512x512 PNG format)
- Windows 7 or above
If you haven't installed the software yet, please visit download link to get the latest version.
Five Steps to Complete APK Packaging
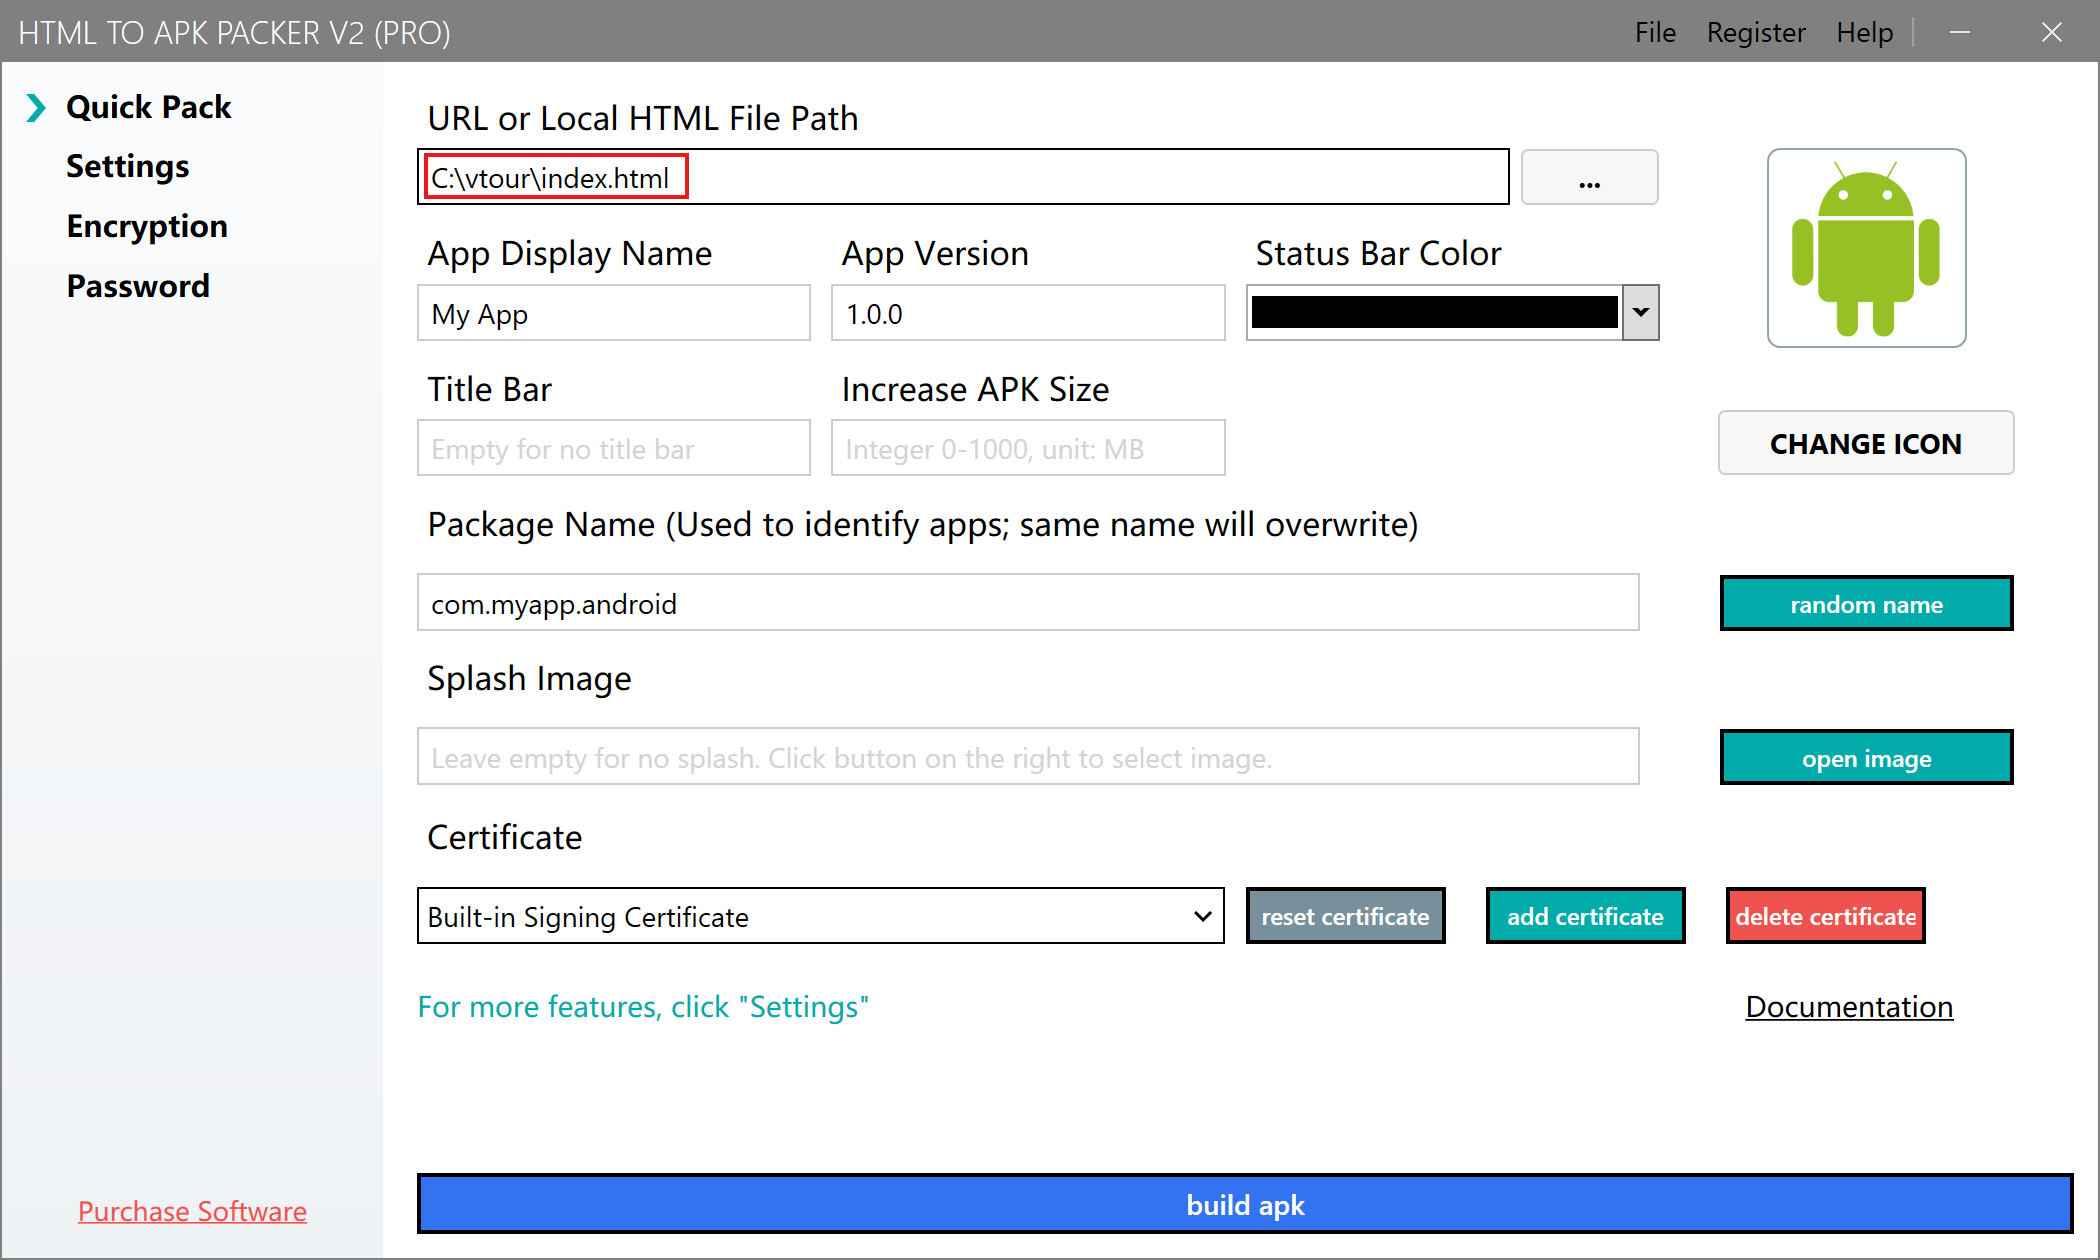
Step 1: Choose Packaging Content
HTML2APK Packer supports two packaging methods. Choose based on your needs:
Method A: Package an Online Website
Use Case: Package a live website (blog, store, landing page, etc.) into an APP
Steps:
- Enter the full URL in the "URL or local HTML path" text box
- Supports http and https protocols
- Example:
https://www.bing.com

Advantages:
- Real-time sync with website updates
- No need to upload HTML files
- Content changes take effect automatically
Method B: Package a Local HTML Project
Use Case: Package offline HTML5 games, VR panoramas, courseware, static websites, etc.
Steps:
- Click the "Open File" button on the right
- Select the entry file of the HTML project (usually index.html, tour.html, etc.)
- The software will automatically recognize the project structure
Advantages:
- All resources are packed into the APK
- No server or network needed
- Code and resources are fully protected offline
- Avoid using Chinese characters in file names and paths of local HTML projects
- Recommended project size: no more than 500MB (32-bit systems) or 1GB (64-bit systems)
- Ensure HTML files use UTF-8 encoding
Step 2: Configure APP Basic Information
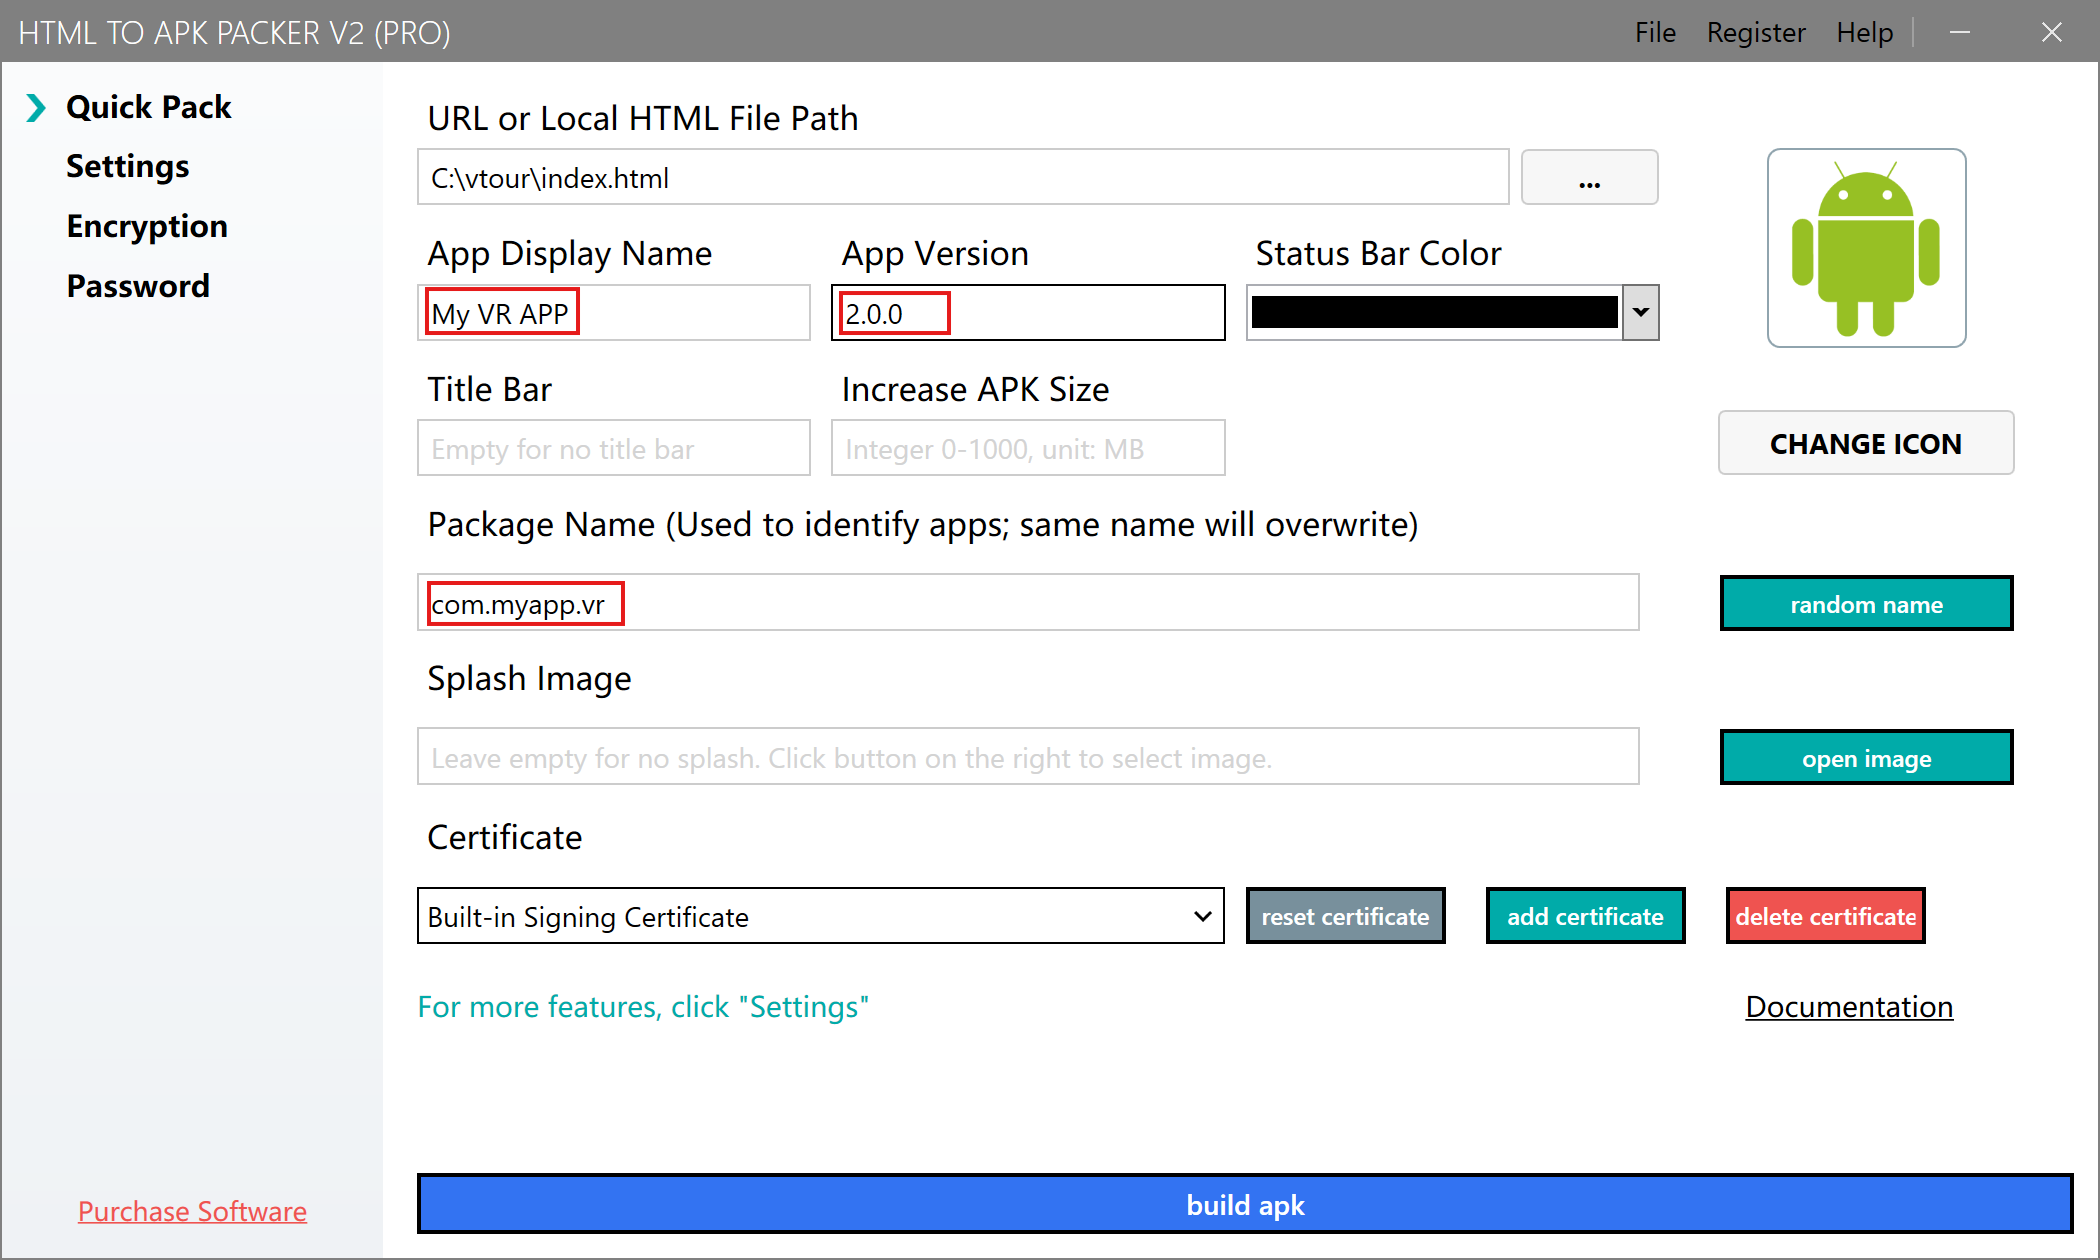
APP Name Setting
Purpose: The APP name will be displayed on:
- Phone home screen below the icon
- Application management list
- Notification bar app name
Naming Tips:
- Length: 2-12 characters is optimal
- Avoid special symbols
- Examples:
My Store,Panorama Viewer,Online Classroom
APP Package Name Setting (Important)
Purpose: The package name is the unique identifier of the APK (like an ID number)
Format Specification:
- Example:
com.example.myapp - Can only contain letters, numbers, and dots
- Must contain at least one dot
Important Notes:
- APKs with the same package name will overwrite each other during installation
- Different versions of the same APP should use the same package name (for easy updates)
- Different APPs must use different package names (to avoid conflicts)
Step 3: Customize APP Icon
Click the "Change Icon" button and select your prepared icon file
![]()
Icon Requirements:
- Recommended Size: 512x512 pixels (optimal)
- Supported Formats: PNG, JPG, JPEG
- Design Tips:
- Use a clean and simple design
- Avoid too many details (they blur at small sizes)
- Transparent background PNG is recommended
- Rounded corners are handled automatically by the system
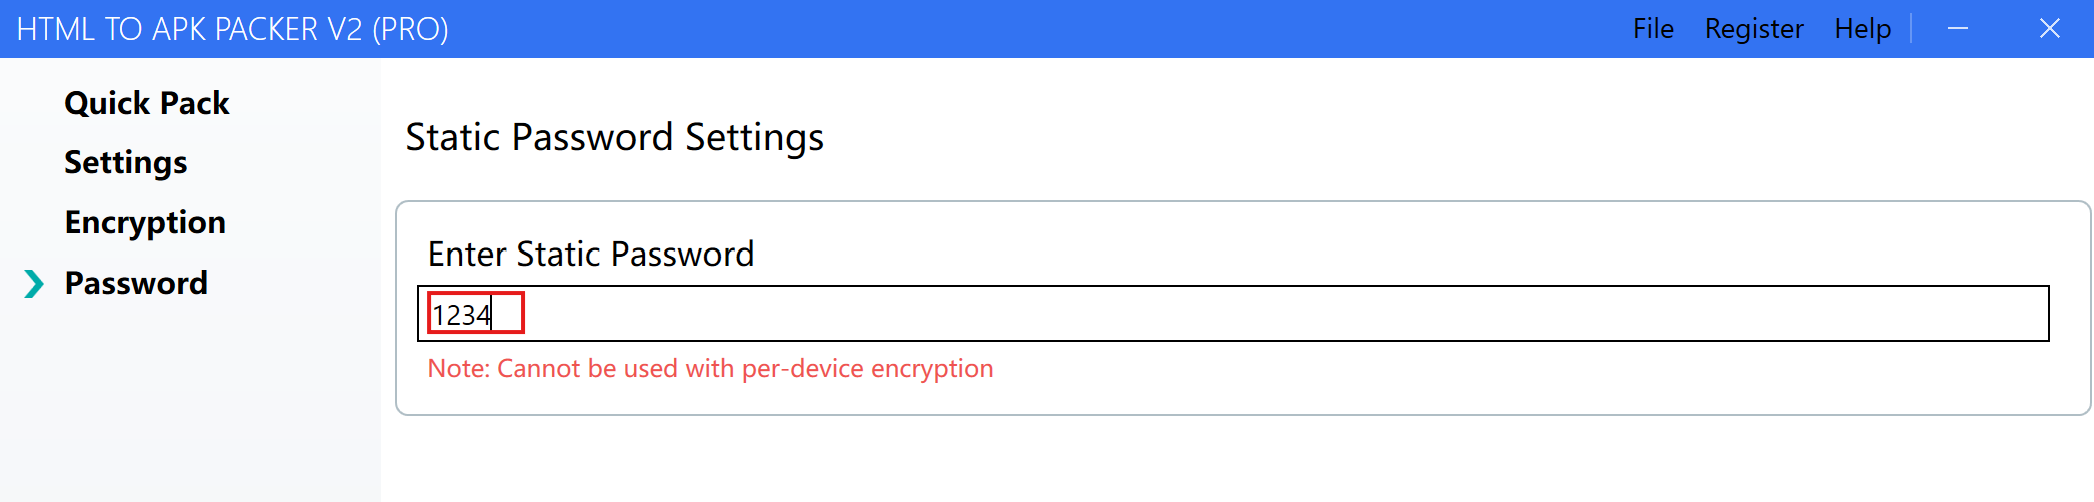
Step 4: Set Access Password (Optional)
If you want to protect APP content, you can set a startup password
Use Cases:
- Enterprise internal apps with restricted access
- VIP member exclusive content
- Paid course protection
- Prevent unauthorized use
After setting a password:
- Users must enter the correct password when first opening the APP
- Incorrect password will deny access
- Suitable for scenarios requiring authorization control
- Use a password that is memorable but hard to guess
- Avoid pure numbers or sequential characters
- Keep the password safe; if lost, you'll need to repackage
Step 5: Start Packaging APK
After completing the above configuration, click the "Package APK" button
Packaging Process:
- The software starts processing (takes 1-3 minutes depending on project size)
- A progress bar is displayed
- When complete, the output folder opens automatically
- The generated APK file can be installed directly
Packaging Time Reference:
- Simple web page: 30 seconds - 1 minute
- Medium project (50MB): 1-2 minutes
- Large project (500MB+): 3-5 minutes
After packaging is complete, you will find the generated .apk file in the output folder. You can now transfer it to an Android device for installation!
Installation & Testing
Transfer APK to Phone
Method 1: USB Cable Transfer
- Connect your phone to the computer via USB cable
- Copy the APK file to your phone's storage
- Find the APK file in your phone's file manager
Method 2: Online Transfer
- Use messaging apps (WhatsApp, Telegram, etc.)
- Use cloud storage (Google Drive, Dropbox, etc.)
- Use file transfer tools (AirDroid, etc.)
Method 3: QR Code Installation
- Upload the APK to cloud storage
- Generate a QR code for the download link
- Scan the QR code with your phone to download and install
Install APK
- Find the APK file on your phone
- Tap the file to start installation
- First-time installation may prompt "Unknown source", you need to allow it in settings
- After installation, you can see the APP icon on the home screen
For security, Android blocks installation of non-store apps by default. During first installation:
- You need to enable "Allow installation from unknown sources"
- The settings location varies slightly by phone brand
- This is a normal security mechanism and does not affect APP functionality
Advanced Features
After completing basic packaging, you can explore more advanced features:
Configuration Optimization
- Detailed Configuration Guide - Fullscreen, landscape, exit prompt, etc.
- One-Device-One-Code Authorization - Device binding and authorization control
- Splash screen settings
- Permission configuration (location, camera, storage, etc.)
Troubleshooting
- Frequently Asked Questions - Check here first when you encounter issues
- Contact Technical Support - Get professional help
Troubleshooting Guide
Quick Self-Check
| Symptom | Possible Cause | Solution |
|---|---|---|
| Packaging failed | Chinese chars in files | Rename to English |
| Install failed | Android version too low | Requires Android 4.4+ |
| Crash | Insufficient memory | Reduce project size |
| White screen | Path error | Check HTML references |
| Feature error | Permission not enabled | See Settings |
Get Help
- Read the Full Documentation
- Check the FAQ
- Email technical support: leapever@foxmail.com
Next Steps
Congratulations on completing the quick packaging tutorial! Next you can:
- Learn Detailed Configuration Options to create a more professional APP
- Understand One-Device-One-Code for authorization management
- Check Pricing Plans to upgrade to Pro and unlock all features